I have to apologize to anyone reading this at this stage of the project. The early, early prep stages are the most boring. It's basically just a bunch of waiting around for putty to dry. Lame.
In particular, I'm waiting for Apoxie Sculpt to dry. A nice and cheaply available 2 part epoxy clay.
Last time, I spent an almost undue amount of time bitching about mold lines and casting flaws. Time to fix them. Lots of people will say that green stuff is the way to go. For organic shapes, I tend to agree. However, green stuff sucks rocks for anything that's supposed to be flat/manmade. Green stuff doesn't hold an edge like you'd hope it would and isn't sand-able. So with gaps and flaws in large, falt areas and along hard lines, green stuff is pretty awful. Mostly because it's really hard to get it so that the fix is flush with the surface.
That's why I go with an expoxy clay. It's water soluble (unlike green stuff) and sand-able which makes it perfect for filling in flaws on flat surfaces.
Right? Right. I made a paste like version of the clay (by adding some water) and stuck it on the areas that needed smoothing and filling. If you look really close you can see the clay around the taint area of Mr. Tyberos.
 |
I also decided to kill two birds with one very sensuous stone:
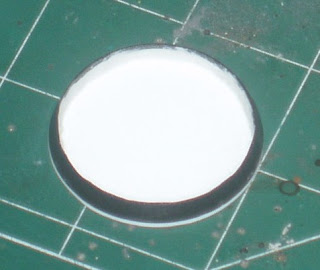
I had the bright idea to hollow out the base and use the resulting negative space instead of building straight up and adding a half inch to the height of the model. Prior to the gap filling, I cut out the ring of the base and then glued it to a piece of plasticard. I then sanded things down and added a ring of apoxie sculpt around the join (on the inside) to seal it in case I wanted to play with a water effect (I kinda do).
 | |
| this picture is over exposed. Sorry. |
Though I did start scratch building the bulkhead segment Tybeors will be standing on. The picture for that bit is freaking awful, so I wont bother with it. All I did was cut out a section of thick plasticard, add a lip using some strips and then do some gap filling.
Not a lot of progress, really. But most of the irritating stuff is out of the way at least. The next post should have at least a few things start to take shape.


No comments:
Post a Comment